Building a server

Hey,

Updates are few and far between at the moment due to my own learning, but this one I’ve had a few questions on recently, so I thought it might be worthwhile sticking up a quick post. Building a server to host a SQL database is slightly different to building a regular App server, so here’s a copy and paste from my standard routine, so apologies for the alignment!. Obviously these are guidelines and are subject to change depending on your requirements, but these are a good starting point if you find yourself on your own!

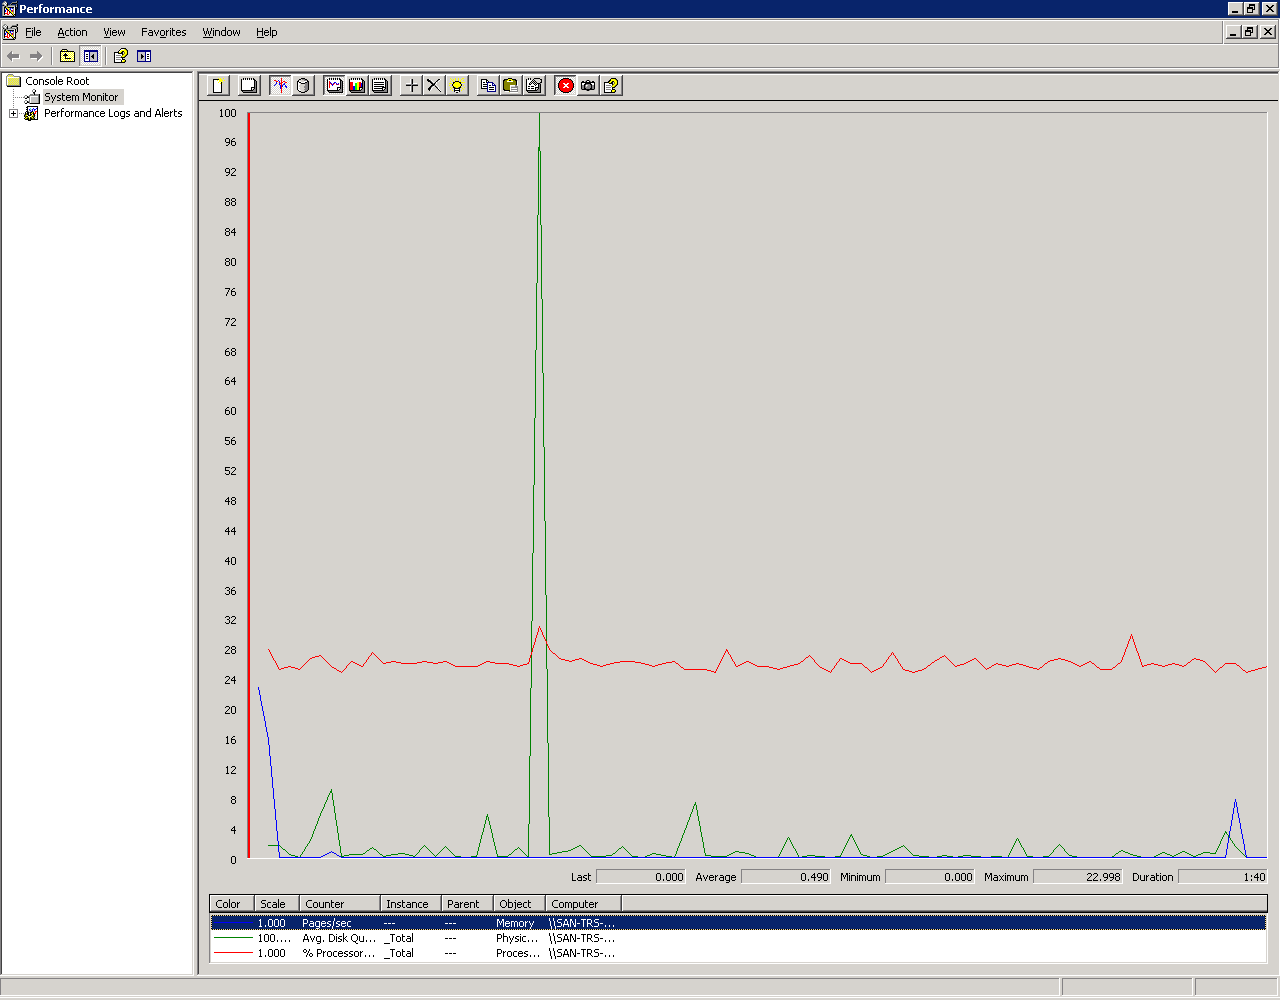
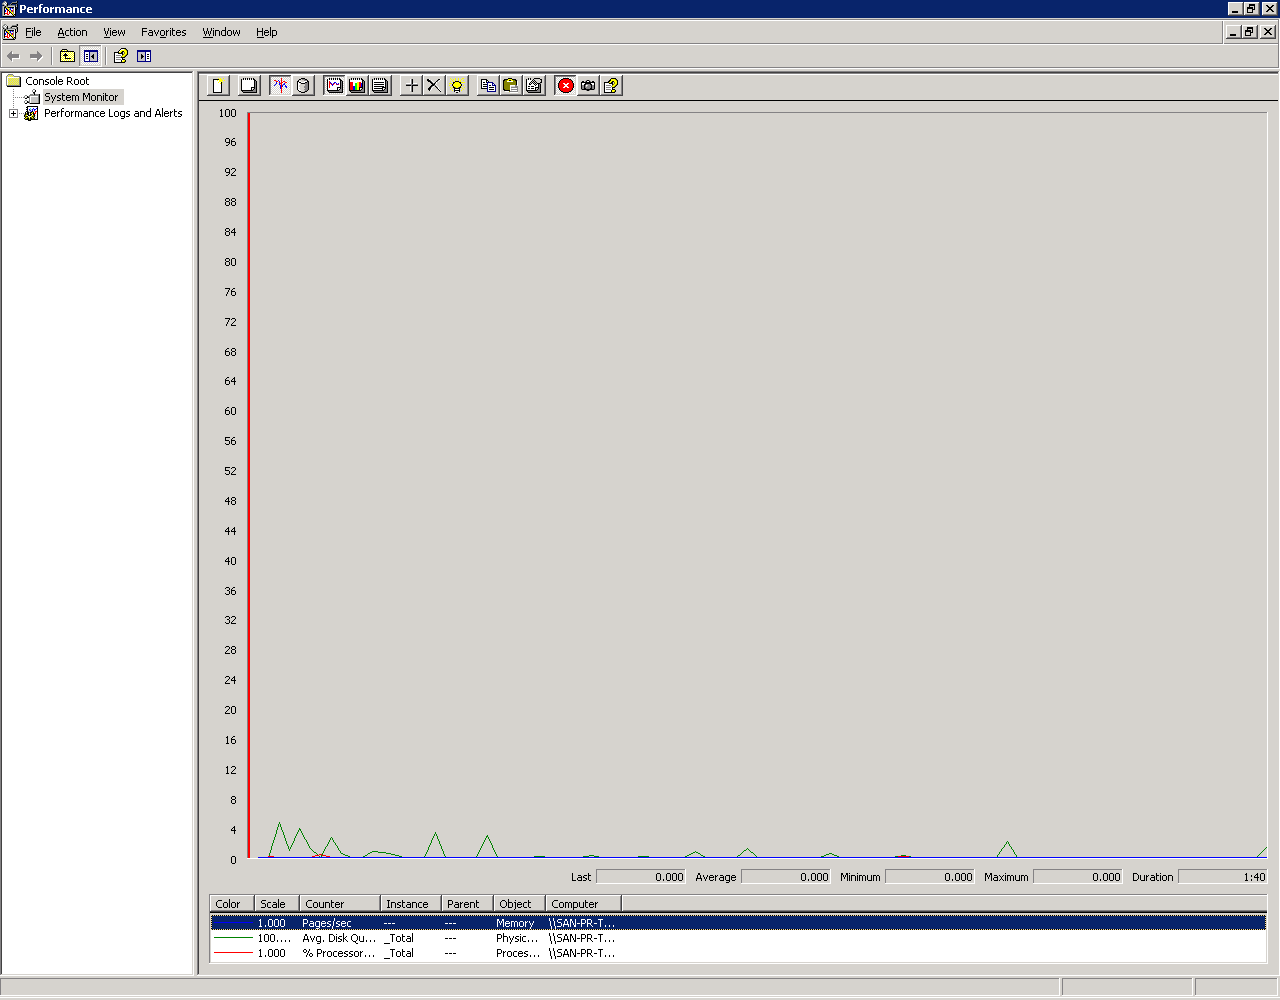
The reasoning behind setting it up this way is that the server will genuinely perform better than if the setup is given a little more attention. Two pictures below of Perfmon, the first one on a server set up by hitting next x infinity, the second set up using the guide below. They were performing the exact same tasks at the exact same time, on exactly the same hardware (including the same SAN). So you can see it gives you a bit of breathing room.

As always, any questions/comments let me know and I’ll do my best to answer them. Good luck!

Pre Install (Usually a kindly System Administrator)

1. Create Raid 10 array where possible for transactional. Raid 5 fine for heavy reads. Check with your developers
2. Create separate partitions for Data/Log and if possible TempDB
3. Partition disk using Diskpart Pre Win 2k8 (2k8 does this automatically) http://technet.microsoft.com/en-us/library/aa995867(EXCHG.65).aspx . This aligns partition and creates 64K blocks
4. Format disks in NTFS, with a 64K block size
5. Configure local security settings for the SQL Server 2005/2008 service account.
Go into Local Security Settings (click Start, Run, type SECPOL.MSC and hit enter) and click Local Policies, User Rights Assignment.
In the permission “Perform Volume Maintenance Tasks”, add your SQL Server service account (or a domain group if you use that).
This enables SQL 2005/2008′s Instant File Initialization, which lets SQL Server instantly grow data files without erasing the physical disk first
In the permission “Lock pages in memory”, add your SQL Server service account or domain group. This lets SQL Server keep all of its data in physical memory instead of swapping it out to disk. Essential to enable AWE on 32 bit systems
6. Configure these settings in boot.ini to allow access to additional RAM on 32 bit software/OS:
4GB RAM: /3GB (AWE support is not used)
8GB RAM: /3GB /PAE
16GB RAM: /3GB /PAE
16GB + RAM: /PAE
Just add onto the end of the boot.ini string
7. Set the page file on c: to 2GB (SQL handles its own paging so doesn’t need a big OS level swap file)
8. If antivirus installed, get it to ignore .ldf .mdf and .ndf files


Notes on Installing

1.      For security purposes don’t install as default instance, install as a named instance
2.      Only install what is needed (If it’s a transactional server, only install database engine. Reporting may need Reporting services etc. Sectioned off server may need Workstation tools installed locally. Analyse on a case by case basis)
3.      Use service accounts where possible to run the SQL Services (don’t forget to allow them admin rights on the server!)
4.      Where possible use only windows authentication(Mixed is ok with strong sa password or sa disabled)
5.      Default directories are fine for location of program files


Post Install (Usually a lowly DBA)

1.      Apply ALL service packs (Check with DB team first to see what patch level they are at)
3.      Enable AWE on 32 bit systems with more than 4GB RAM (Management Studio -> Right click instance -> Properties -> Memory
4.      Set Maximum server memory to 2GB below installed RAM
5.      Set Minimum server memory to 2GB below Max
6.      Set Default database paths to folders on your Data/Log partitions (Management Studio -> Right click instance -> Properties -> Database Settings)
7.      Create Maintenance plans for Full backups, Log backups, Backups clean-up, DBCC checks and Job History clean-up
8.      Configure SQL Agent operator, database mail and alerts on jobs
9.      Move system databases to your Data/Log drives
10.  Create TempDB.ndf files (1/4 the amount of cores. So 8 core has 2 TempDB files. More if you see bottlenecks)
11.  If possible extend your TempDB mdf/ndf files to ¼ of the size of your largest DB. Otherwise extend to reasonable amount considering drive space
12.  Take SQL Instance offline and run Power Defragmenter(GUI For Contig) on your Data and Log drives to make them contiguous
13.  Take everything back online and have at it!


Leave a Comment

Your email address will not be published. Required fields are marked *

This site uses Akismet to reduce spam. Learn how your comment data is processed.